It's that time of year again....
Time for fun Halloween treats for your kids and their classmates...
And Halloween crafts perfect for teacher gifts...
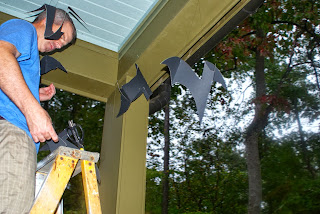
And convincing your very sweet hubby to climb that ladder once again to hang the cardboard bats from your front porch ceiling...
Time to put out the pretty mums and heirloom pumpkins in all their multitude of colors...
Time to make precious memories with your kids as you paint pumpkins for their class Halloween party...
Time for football games and other fall fun...

But for our family it is also the time of year that every sight, sound, and activity conjures up some memory of our last month with sweet Olivia on this earth three years ago. That was the last month we could hold her, rock her, laugh with her, and watch her. For that reason this month is always hard. I look at the picture above and it seems like yesterday, but it also seems like we've lived a lifetime since that moment. I wonder what she would want to be for Halloween this time every year. Yesterday Parrish and I were talking about it and he said, "She would definitely want to be a princess. She was so girly!" And I tend to agree. Oh how our entire family longs to see her here again. How I mourn the mother/daughter relationship I am missing on this side of heaven. So many times I sit and try to "work out" my life in my head. What my plan for our future will be and what I believe God is asking of me. But somehow I always wind up confused. And then I realize that I am confused because I am trying to figure it out on my own, in my timing, and not laying it at the feet of Jesus and trusting, I mean really TRUSTING, that He will open or close doors to show me the way if I will just wait patiently (albeit not so contently) in the palm of his hand.
Ten years ago when Cannon and I got married, my Aunt wrote this verse to us on the night of our rehearsal dinner:
"Many are the plans in a person’s heart,
but it is the Lord’s purpose that prevails." Proverbs 19:21
As I read that verse I'll admit I feel a sadness that my God's overall purpose would involve such heart ache for my family in this life. Then I read Isaiah and realize this truth. I am human. I cannot even begin to understand or fathom God and His purpose. In Isaiah 40:13 it asks, "Who is able to advise the Spirit of the Lord? Who knows enough to give him advice or teach him?" In verse 14 it says, "Has the LORD ever needed anyone's advice? Does he need instruction about what is good? Did someone teach him what is right or show him the path of righteousness?" No, we as humans cannot begin to understand or advise a God who "measures the heavens with his fingers."
But I do know that Isaiah also tells us that God's "salvation will last forever, (his) righteousness will never fail." (Isaiah 51:6) And I am thankful that I do not have to doubt this. Because of this I can trust in the one who "carried me before I was born." (Isaiah 46:3) I can trust, even though I do not understand. What a burden is lifted from me when I let go of my plans and place them in my heavenly father's hands, trusting him and not myself, trusting him and not humanity or the idols we look to for happiness on this earth. They are nothing compared to his righteousness or the glory that awaits us in heaven. This is something that He has to remind me of daily. Don't we all as humans desperately want to control our own lives?
One of my favorite verses in Isaiah is 43:18-19:
"Forget the former things;
do not dwell in the past.
See, I am doing a new thing!
Now it springs up; do you not perceive it?
I am making a way in the desert
and streams in the wasteland."
I cling to that verse and pray for the strength to stay the path. To be obedient. To not trust in myself or others - but to trust in the one who loves me, and my children, more than I can even fathom.
And so, although this time of year is difficult, it is also filled with fun family activities that take our minds off of our heartache and I am thankful to have two precious boys to make holiday memories with and the avenue of this blog to share those creations with you.
This is Knox's first year in preschool so I wanted to come come up with a treat to give his classmates that they could actually eat, as opposed to candy. So I took a lollipop stick and stacked three marshmallows onto it. Then I melted semi-sweet chocolate in the microwave for 1 minute, stirred until smooth, and placed it into a small ziploc bag, worked it into the bottom corner, then snipped off that corner of the bag to create a make-shift piping bag.
Then I drew three circles, one inside the other, onto the marshmallows (like so) and starting in the middle, used a toothpick to pull outward to create a spider-web effect. (see below)
I found some little lime green candy spiders at Michael's the other day and plan to add one to each chocolate web when it's still wet, then I will sprinkle a few more bugs into the bottom of a clear plastic gift bag, insert the marshmallow spider lollipop and tie with a cute bow for each of his little buddies. I love the way they turned out.
And Parrish loved eating my tester marshmallow lollipop when he got home from school!
And because teachers cannot be left out of the Halloween fun, I decided to do a little craft for them as well. I bought small wooden plaques at Michael's (they come in a set of 6 back in the wood working department), taped off a thin band all the way around with duct tape...
Then used chalkboard spray paint (purchased at Lowe's) to spray the plaque.
Once it was dry I slowly removed the duct tape and was left with a cute miniature chalkboard.
From there a hot glued a standard-size clothespin to the back.
And was left with a cute place to write a "Happy Halloween" message to the teachers in chalk.
Then I wrapped up my Blue Agave & Bamboo scented candles (only $5.99 at Target!) in Halloween shredded paper and twine and clipped the mini chalkboard to the outside. I love that the gift tag is part of the gift itself!
And of course Mr. P could not be left out of the Halloween fun, so we got together and painted pumpkins for his 1st grade class to decorate during their Halloween party. We spray painted half with my leftover black chalkboard paint and half with some high gloss white paint that I thought the girls in the class might prefer.
Once they dried we used neon paint to dip the white pumpkins in, then turned them upside down and used a paint brush to help it ooze down the sides of the pumpkin, then attached a felt spider (from Michael's) near the stem. For the black chalkboard pumpkins we used chalk markers to draw a web and spider, then stuck the felt spider on top. I think the kids are going to have so much fun making them!
In other family news, my youngest baby boy is not an infant anymore! He is growing up way to fast. I look at him daily and wonder how he is already a toddler?!?! He was growing what we lovingly referred to as a "baby mullet" so I took him to have his first hair cut. And that solidified it...my baby is turning into a big boy.
A big boy who loves to explore...
Who I find daily hiding inside my orange crates...
Or climbing on top of them...
His newest trick is pointing. He can pretty much convey whatever he wants with this new found skill and uses it to it's full advantage. He is so much fun. I love watching him figure things out (we've decided he's a baby genius of course) and how excitable he is. He has a zest for life that every adult can learn from and that one dimple gets me every time he smiles. Although this season has it's sorrow, this baby (toddler) boy brings us so much indescribable joy. Sometimes I wish I could just press the pause bottom, you know?!
Last weekend we took him to his first Auburn game down on The Plains and had so much fun reconnecting with friends and hanging out with family. Parrish particularly like the homecoming floats that were scattered about.
I have missed my old Southern Living cohort Courtney so much. We met at work many moons ago and became fast friends as did Cannon and Courtney's husband Chet. We have so many fond memories of our dating and early married days with them. They were old hats at the married game and I love thinking about out fun times together during those days!
Knox cheered the Tigers to a victory that day.
Or as Parrish put it, "We smoked them, Momma." That we did, son. That we did.
After the game we stayed the night in Auburn to celebrate Frankie (aka Pap) turning 60!! All of his kids and grandkids came to surprise him at a birthday dinner that night and we had so much fun visiting.
We went to the Overall Co in Opelika and had some Overall Pops while we were there to celebrate and this is Knox's hilarious sour/cold face after we gave him a bite. Hilarious!
And somehow Mr P ended up double fisting...That lemon basil pop was yummmmoooooo, I tell you. It would be worth double fisting for sure!
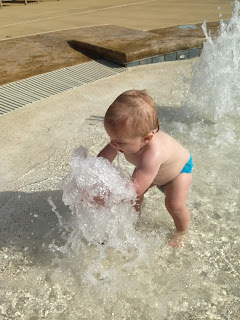
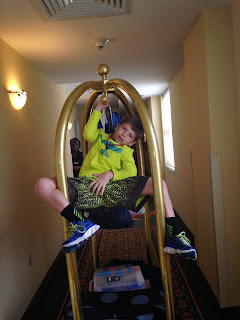
The hotel we stayed at had an amazing pool and splash pad/slide for the kids. So even though it is the middle of October and the pool was not heated, we braved the frigid waters and had so much fun playing.
When we got back home Parrish had his "five minutes of fame" by appearing on the local NBC news station during his Cub Scout pack's tour of the studios. He is quite proud and of course, so are we!


